How do I digitize a shooting target?
To photograph and automatically evaluate shooting targets with your cell phone camera, first choose a suitable background for your target.
Image-based hit detection works by distinguishing a uniform color of the bullet holes from the two colors of the target (usually the color of the cardboard and the black print). The background on which the target is placed corresponds to this color of the bullet holes. It should be matte, solid and unpatterned. Textures, such as wood grain, carpeting or writing, will interfere with recognition. The most suitable colors are those that differ as much as possible from the colors of the target, such as colored construction paper (green, red, blue, …). If this is not available, a simple white sheet of paper will suffice in most cases. Please do not use any other target as a background, otherwise no characteristic hit color can be determined. Avoid using shot patches as they also interfere with detection.
Switch to the target acquisition. You should now see a live image from your camera. The individual elements are described in more detail here. Then perform the following steps.
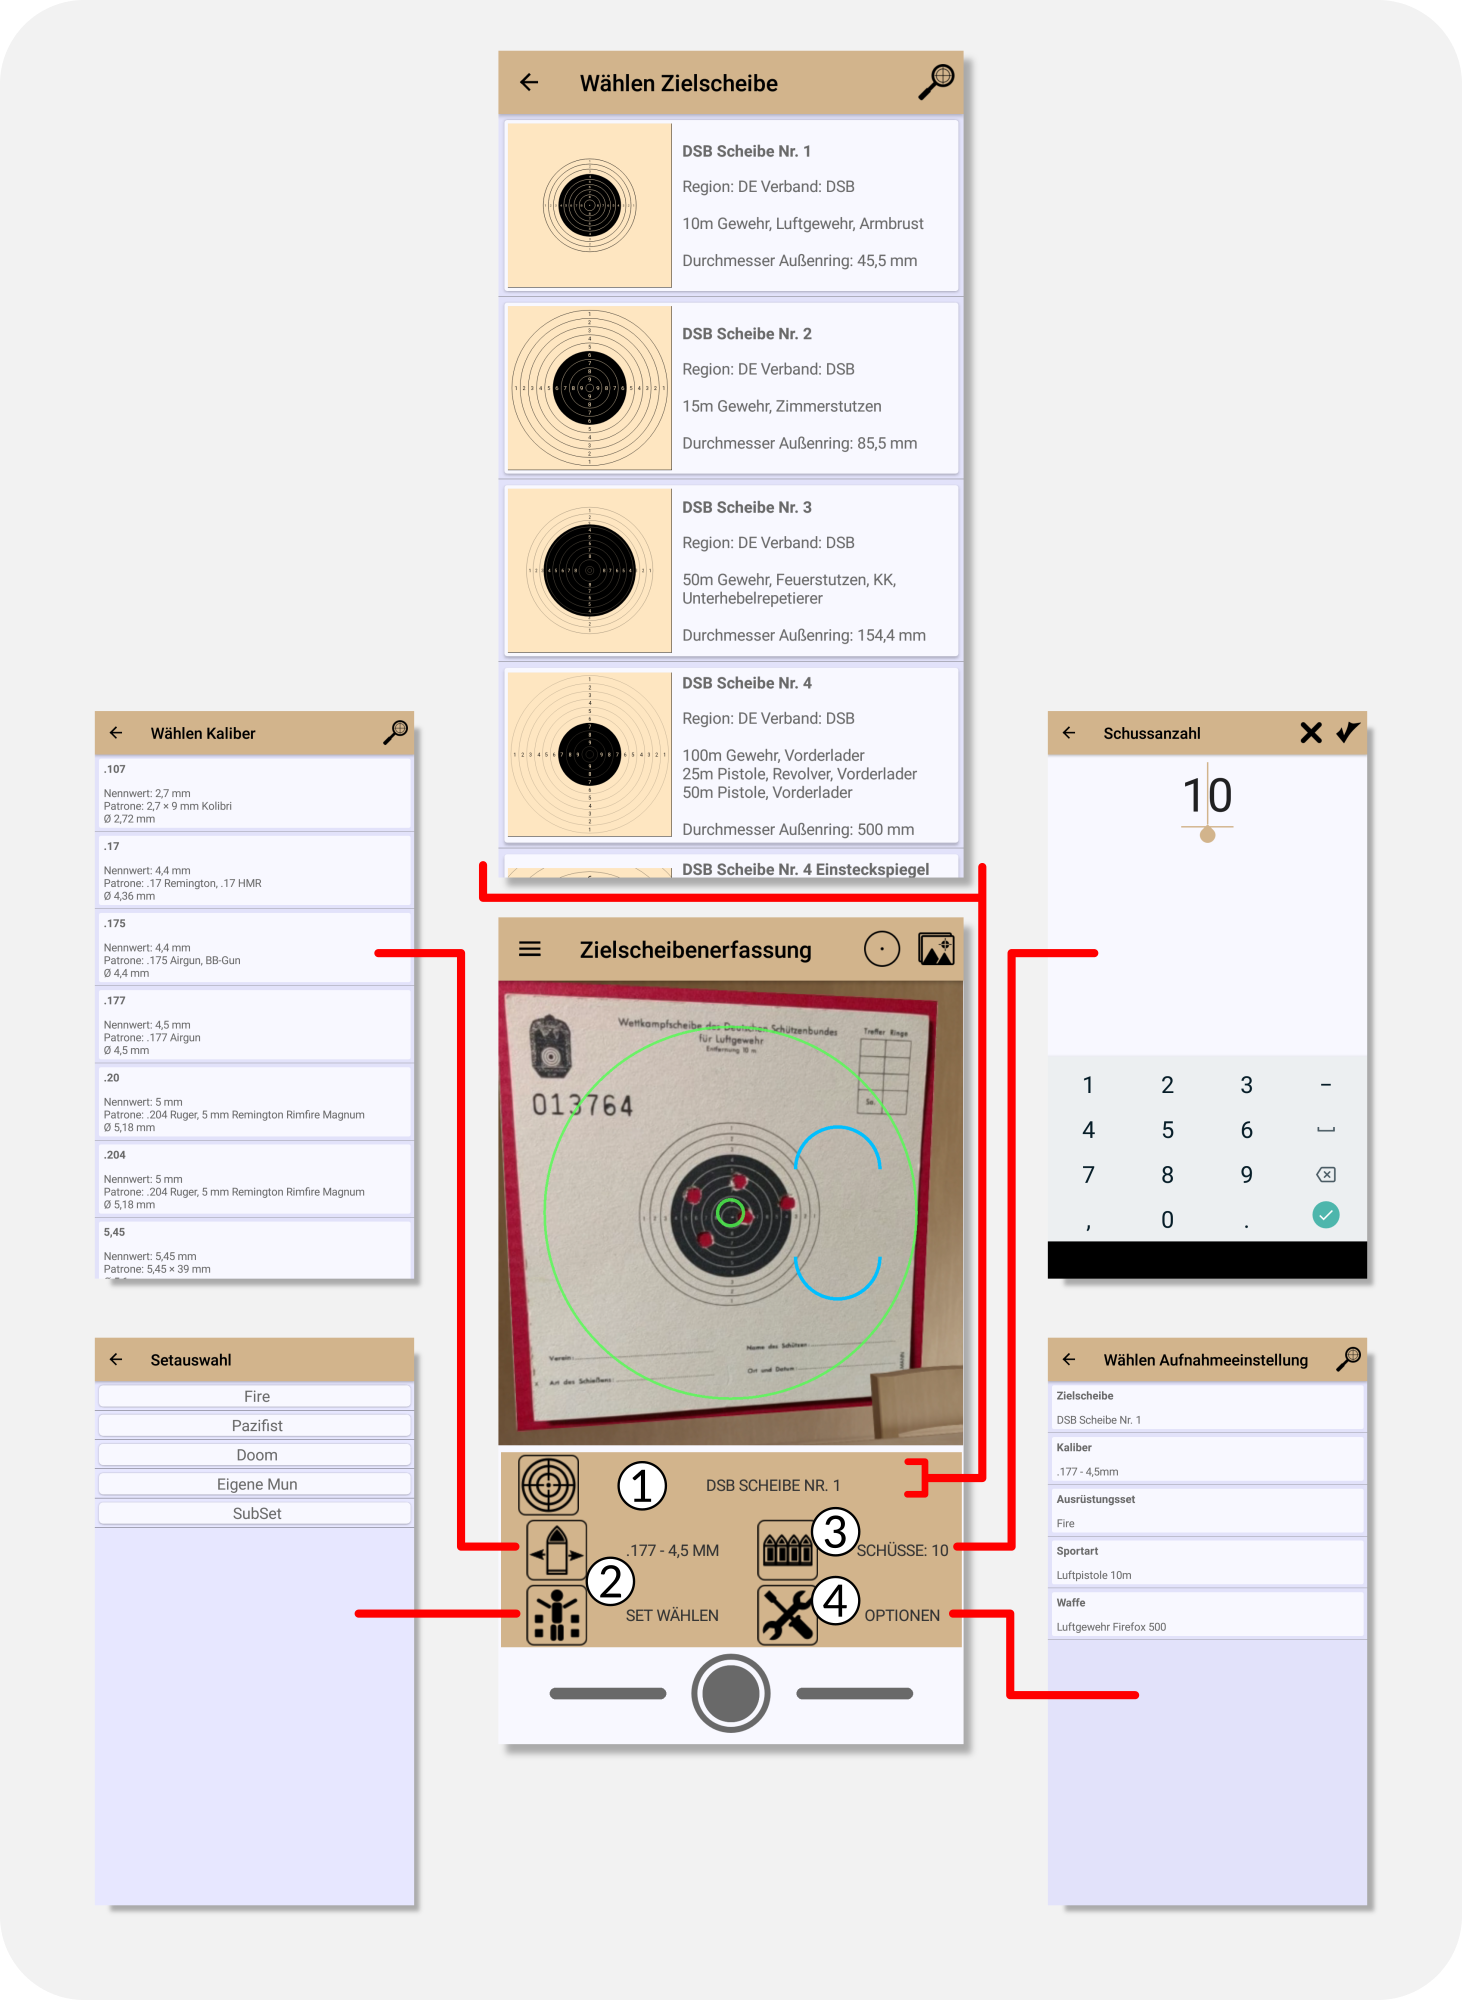
- Select the target you want to scan. It is very important that the correct target is set. When choosing, make sure that insert targets are distinguished. A small help is the indication of the diameter of aiming mark. For strips, choose the target as a plug-in target if possible. Each mirror on the strip must be detected and evaluated separately.
- Choose a set, or if you don’t have a set, the caliber with which the target was shot. With a set you can create different templates (combinations) from your equipment and use them here as a quick selection. See also: What is a set, what is it good for, and how do I create one?
For the image-based evaluation only the expected hole size of the hits on the target is relevant. Some types of ammunition may produce holes that differ significantly from the specified bullet diameter of the selected caliber. In this case, select the caliber whose bullet diameter most closely matches the holes on your target and then additionally select the original caliber in the sport under Extra options so that the ring values are again correctly determined based on the caliber actually shot. - Choose the number of shots you expect. The app will never find more hits than you have set. You get an optimal result when the set value is equal to the expected value.
Here is once again a detailed overview of all settings.

Now move your cell phone horizontally over your target. The camera and target should be held as parallel to each other as possible. The small green auxiliary point in the center of the image should be above the center of the mirror. The outer ring of the target should roughly coincide with the green ring-shaped outer marking.
The two blue half rings indicate how well the camera is positioned with respect to the target. They move toward each other the more parallel the target is to the camera.
If the ring around the shutter release button is red, no target is detected at all and no picture can be taken.
If the ring is gray, only a manual exposure is possible, because the position of the camera with respect to the target is not optimal. This can also happen if the black inner circle is too shot up. If the ring remains gray despite parallel alignment, you can now take a manual image by pressing the shutter release button.
If the ring is green, the target is optimally aligned with the camera. If the auto trigger is activated, a picture is taken automatically. Keep the phone stable until the captured image is displayed and the evaluation begins.

Depending on the type of phone, the analysis takes a few seconds. After that, the detected hits are in the so-called editor. The data is not yet saved. Learn more about editing and saving digitized results.